Categories
Uncategorized

What Is The Most Durable Flooring For A Garage?

When it comes to garage flooring, it must last. Your garage floor has to deal with a lot of foot traffic, heavy machinery, and spills, so it needs to be strong.

But because there are so many kinds of flooring on the market, it can be hard to figure out which one will last the longest for your needs. We can help with that!

In this article, we’ll talk about some of the most durable flooring options for your garage, including their pros and cons, to help you make an informed choice.

We have what you need, whether you want something cheap, low-maintenance, or stylish. So, let’s get started and find the best flooring for your garage!

What Is The Most Durable Flooring For A Garage?

There are a variety of garage flooring materials from which to choose the most long-lasting one. Some of the most well-liked and long-lasting choices are as follows:

Epoxy Flooring

Epoxy is a popular choice for garage flooring because it is extremely durable and can withstand heavy foot and vehicle traffic. It is also resistant to oil, gasoline, and other chemicals that are commonly found in garages.

Epoxy flooring is easy to clean and maintain, and it can also be customized with a variety of colours and patterns.

Epoxy flooring is a coating that consists of a resin and hardener that are mixed. The combination of these two materials yields a sturdy covering for concrete floors in garages, warehouses, and other industrial locations.

Epoxy flooring is widely used because it lasts long, is impervious to water and chemicals, and requires little in the way of upkeep. It can withstand dampness and spills without becoming dangerously slippery.

Cleaning and correcting any fractures or defects in the concrete surface are standard first steps in the process of laying epoxy flooring.

After trowelling or rolling the epoxy mixture onto the surface, it has to cure for several hours or days.

Colours and textures for epoxy flooring range from highly reflective to matte and shiny. It’s easy to give it a one-of-a-kind look by adding your logo or favourite pattern.

Epoxy flooring is often used in both commercial and residential garages since it is long-lasting and requires little in the way of upkeep.

Concrete Flooring

Concrete is another durable option for garage flooring. It can withstand heavy loads and high traffic, and it is also resistant to chemicals and moisture.

Concrete flooring can be sealed to prevent staining and can be painted or stained for a more decorative look. Garage Flooring made of concrete is a popular and long-lasting choice.

Cement, sand, water, and other aggregates are mixed and placed onto a levelled subfloor, where they cure and solidify.

Garages, which see a lot of foot activity, are perfect places for tough, long-lasting flooring made of concrete. Mould and mildew are stunted in their development because of their moisture resistance.

Concrete flooring is also a low-maintenance alternative because it is simple to clean and disinfect.

The many options available for concrete floor treatments are one of the material’s many advantages.

It can be kept in its raw, industrial state, or given a more ornamental appearance by painting, staining, or polishing. Sealing a concrete floor can protect it from stains and extend its life.

Concrete floors must be installed on a level and well-prepared subfloor to avoid bumps and unevenness.

Once the subfloor is prepared, the concrete mixture is placed on top and allowed to cure, a process that might take several days depending on the slab’s thickness.

In general, concrete floors are inexpensive and long-lasting, making them a great choice for garages.

It is favoured by both residential and commercial property owners due to its durability, resistance to dampness, and variety of available finishes.

Rubber Flooring

Rubber flooring is a good option for those who want a softer surface in their garage. It is durable and can withstand heavy traffic, but it is also slip-resistant and provides cushioning underfoot.

Rubber flooring is easy to clean and maintain and comes in a variety of colours and patterns.

Rubber flooring is a robust flooring option that can be fabricated from either natural or synthetic rubber. Because of its toughness, slip resistance, and capacity to cushion the feet, it is frequently used as garage flooring.

Rubber flooring can be obtained in rolls or interlocking tiles of varying thicknesses and textures, making it ideal for DIY projects.

It comes in many different colours and designs, making it a flexible option for individuals seeking a more ornamental appearance.

Rubber flooring’s high moisture resistance makes it a good option for damp environments like garages, where accidents are more likely to occur.

It can withstand the chemicals and oils that are often present in a garage. Rubber floors can be kept clean with a simple sweep or mop every so often.

Rubber flooring is soft and cushiony, making it ideal for areas where people must stand for extended periods. It is also slip-resistant, so it’s a good choice for locations that tend to get damp or slippery.

Garages that store noisy or vibrating machinery or cars can benefit from rubber flooring’s soundproofing and vibration-dampening properties.

In conclusion, rubber flooring is a long-lasting and adaptable choice for a garage.

Its slip- and cushion-resistant qualities, as well as its resilience to moisture, chemicals, and oils, make it a favourite for both indoor and outdoor use.

Interlocking Tiles

Interlocking tiles are a versatile and durable option for garage flooring. They are made from materials such as PVC, rubber, or polypropylene and are designed to interlock together for easy installation.

Interlocking tiles are resistant to chemicals and moisture and can withstand heavy loads and traffic. 

Garage flooring can be found in the form of interlocking tiles, typically constructed from PVC, rubber, or polypropylene. These tiles are made to fit snugly together, making for a smooth, long-lasting, and simple-to-clean surface.

Garage flooring can be personalised to suit the tastes of homeowners thanks to the availability of interlocking tiles in a wide variety of colours, patterns, and textures.

They come in a variety of sizes and thicknesses, so you can pick one that works in your garage.

The simplicity of setting up an interlocking tile floor is a major advantage. The tiles can be installed directly on top of a concrete or wooden subfloor with no additional adhesives or preparation.

They are a practical and economical choice because they can be quickly and simply installed or removed as needed.

Water, chemicals, and oils are frequent in garages, but interlocking tiles are tough enough to withstand these conditions.

They are resilient enough to resist foot traffic and comfortable enough for people to stand on for extended periods.

To maintain interlocking tiles clean and clear of debris, you need to do nothing more than sweep them regularly and mop them sometimes.

Conclusion

Garage floors can be made from a variety of resilient materials, such as epoxy, concrete, rubber, or interlocking tiles.

These choices vary in cost, functionality, and other characteristics that make them well-suited to specific garage settings and uses.

Epoxy flooring is well-liked because of its long lifespan, resistance to chemicals and dampness, and low maintenance requirements. Concrete flooring is an affordable option with a wide variety of design possibilities.

Rubber flooring provides a safe and comfortable surface that is also chemical and moisture-resistant. In addition to being resilient and seamless, interlocking tiles are also adaptable and simple to install.

Several criteria, such as financial constraints, individual taste, and the demands of the garage itself, will determine the optimal flooring material.

Homeowners may find the best garage flooring to suit their needs and improve the space’s functioning and look by thinking about the aforementioned elements and weighing the benefits of each option.

In search of durable flooring for the garage? Go to wall mounted garage storage to know more!

Categories
Uncategorized

Types Of Machining Operations

The manufacturing sector relies heavily on machining services. The term “machining” refers to a broad category of manufacturing techniques used to transform unfinished materials into functional components.

So, what are the various forms of machining processes that are employed in manufacturing? If you want to learn more about the different kinds of machining operations, you’ve come to the right place.

What Is Machining?

Machining is the process of removing material from a workpiece to create a desired shape or size. This is typically done using cutting tools such as drills, lathes, milling machines, and grinders.

Machining aims to produce parts or components that meet certain specifications in terms of size, shape, and surface finish. Machining can be performed on a variety of materials, including metals, plastics, ceramics, and composites.

It is a key process in the manufacturing of many products, including automobiles, aircraft, and medical devices. Machining can be done manually or with the use of computer-controlled machines, also known as CNC machines.

Types Of Machining Operations

Several types of machining operations are commonly used to remove material from a workpiece. Here are some of the most common types:

1. Turning: 

Turning is a machining operation in which a cutting tool is used to remove material from a rotating workpiece to produce a cylindrical shape.

This is achieved by holding the workpiece in a chuck or collet, and rotating it at high speeds while a single-point cutting tool is fed into the workpiece to remove material.

The cutting tool may be stationary or may move along the length of the workpiece as it rotates.

There are several different types of turning operations, including:

  • Facing: In facing, the cutting tool is fed radially into the workpiece to produce a flat surface.
  • Taper turning: Taper turning involves cutting a conical shape on the workpiece. This can be done by setting the cutting tool at an angle to the workpiece or by using a compound rest.
  • Threading: Threading involves cutting a helical groove on the inside or outside of a cylindrical workpiece. This is typically done to create threads for screws or bolts.
  • Grooving: Grooving is used to create a channel or groove on the surface of the workpiece. This can be done to provide clearance for a part or to create a decorative feature.

Turning can be done manually on a lathe or with the use of computer-controlled machines, also known as CNC lathes. CNC lathes can produce parts with high precision and accuracy, making them a popular choice for manufacturing.

Turning is commonly used in the production of components for various industries, including automotive, aerospace, and medical devices.

2. Milling:

Milling is a machining operation in which a rotating cutting tool is used to remove material from the surface of a workpiece to produce a variety of shapes, including flat surfaces, grooves, slots, and complex three-dimensional shapes.

The cutting tool is held in a spindle that can rotate in different directions and is moved along multiple axes to create the desired shape.

There are several types of milling operations, including:

  • Face milling: In face milling, the cutting tool is positioned perpendicular to the workpiece and removes material from the surface of the workpiece to create a flat surface.
  • Peripheral milling: In peripheral milling, the cutting tool is positioned parallel to the workpiece and removes material from the edges of the workpiece to create a specific shape or profile.
  • Slot milling: In slot milling, the cutting tool is used to create a slot or channel in the workpiece.
  • Profile milling: In profile milling, the cutting tool is used to create a specific shape or contour on the surface of the workpiece.
  • 3D milling: 3D milling is used to create complex three-dimensional shapes and features on the surface of the workpiece.

Milling can be done manually or with the use of computer-controlled machines, also known as CNC mills. CNC mills can produce parts with high precision and accuracy, making them a popular choice for manufacturing. 

3. Drilling:

Drilling is a machining operation in which a rotating cutting tool called a drill bit is used to create a hole in a workpiece. The drill bit is held in a chuck and rotated at high speeds while it is fed into the workpiece, removing material to create the desired hole.

There are several types of drilling operations, including:

  • Twist drilling: In twist drilling, a standard drill bit with two flutes is used to create a cylindrical hole in the workpiece.
  • Counterboring: Counterboring involves creating a flat-bottomed hole with a larger diameter than the original hole. This is often done to provide a seating surface for a bolt head or other fastener.
  • Countersinking: Countersinking involves creating a conical-shaped recess at the top of a hole. This is often done to provide a seating surface for a screw or to allow the head of a screw to sit flush with the surface of the workpiece.
  • Spot drilling: Spot drilling involves creating a small indentation on the surface of the workpiece to provide a starting point for the drill bit.

Drilling can be done manually or with the use of computer-controlled machines, also known as CNC drills.

4. Grinding:

Grinding is a machining operation in which an abrasive wheel or belt is used to remove material from the surface of a workpiece to create a specific shape, surface finish, or dimensional accuracy.

Grinding can be used to produce flat surfaces, cylindrical shapes, and other complex shapes.

There are several types of grinding operations, including:

  • Surface grinding: In surface grinding, an abrasive wheel is used to grind the surface of a flat workpiece to a smooth finish.
  • Cylindrical grinding: In cylindrical grinding, an abrasive wheel is used to grind the outside diameter of a cylindrical workpiece to a specific dimension.
  • Centerless grinding: In centerless grinding, a workpiece is held in place between two wheels and is ground to a specific diameter without the use of a centre.
  • Internal grinding: In internal grinding, an abrasive wheel is used to grind the inside diameter of a cylindrical workpiece.
  • Tool and cutter grinding: In tool and cutter grinding, special grinding machines are used to sharpen cutting tools such as drills, end mills, and reamers.

5. Broaching: 

Broaching is a machining operation in which a special cutting tool, called a broach, is used to remove material from the surface of a workpiece to create a specific shape or feature.

The broach is a long, narrow tool with multiple teeth that progressively increase in size along its length.

The broach is guided through a pre-cut hole or opening in the workpiece and as it is pulled through the hole, it removes material to create the desired shape. Broaching is often used to create keyways, splines, and other internal shapes or features in parts.

There are several types of broaching operations, including:

  • Internal broaching: In internal broaching, the broach is used to create internal shapes or features such as keyways, splines, or slots.
  • External broaching: In external broaching, the broach is used to create external shapes or features such as gears or splines on the surface of the workpiece.
  • Surface broaching: In surface broaching, the broach is used to create a specific surface finish on the workpiece.

Broaching can be done manually or with the use of specialized machines. CNC broaching machines can produce parts with high precision and accuracy, making them a popular choice for manufacturing.

Broaching is commonly used in the production of components for various industries, including automotive, aerospace, and machine tools.

6. Honing: 

Honing is a machining operation in which a specialized abrasive stone is used to remove material from the surface of a workpiece to improve its surface finish, dimensional accuracy, and roundness.

Honing is typically used to create a precise and smooth surface finish in bores or cylindrical shapes.

During the honing process, a honing tool with abrasive grains embedded in the stone is moved in and out of the workpiece, removing a small amount of material with each pass.

The honing tool is typically rotated and oscillated to evenly distribute the abrasive grains and create a consistent surface finish.

There are several types of honing operations, including:

  • Internal honing: In internal honing, a honing tool is used to improve the surface finish and dimensional accuracy of internal cylindrical shapes such as bores or sleeves.
  • External honing: In external honing, a honing tool is used to improve the surface finish and dimensional accuracy of external cylindrical shapes such as shafts or rollers.
  • Diamond honing: In diamond honing, a diamond abrasive is used to create a very precise and smooth surface finish on hard materials such as ceramics or tungsten carbide.

Honing can be done manually or with the use of specialized machines. CNC honing machines can produce parts with high precision and accuracy, making them a popular choice for manufacturing.

Honing is commonly used in the production of components for various industries, including automotive, aerospace, and hydraulic systems.

7. Electrical Discharge Machining (EDM):

Electrical Discharge Machining (EDM) is a non-traditional machining process in which material is removed from a workpiece using sparks generated by an electrical discharge between an electrode and the workpiece.

EDM can be used to machine complex shapes and difficult-to-machine materials such as hardened steels, titanium, and exotic alloys.

The EDM process involves immersing the workpiece and the electrode in a dielectric fluid, such as oil or deionized water. A voltage is then applied between the electrode and the workpiece, creating a spark that erodes the material from the workpiece.

The electrode is moved closer to the workpiece, and the process is repeated until the desired shape is achieved.

There are two types of EDM:

  • Wire EDM: In wire EDM, a thin wire is used as the electrode to cut the workpiece into a desired shape. The wire is continuously fed from a spool to maintain a consistent cutting distance.
  • Sinker EDM: In sinker EDM, a specially shaped electrode is used to create a cavity or hole in the workpiece. The electrode is submerged in the dielectric fluid, and the workpiece is placed on top of it. A spark is generated between the electrode and the workpiece, eroding the material to create the desired shape.

EDM can be used to create intricate shapes and patterns, such as dies, moulds, and gears. It is commonly used in the aerospace, automotive, and medical device industries for the production of complex parts.

EDM can also be used for surface finishing and for creating small holes and features in hard materials.

These are just a few of the many types of machining operations that are commonly used in manufacturing. The choice of operation depends on the type of material being machined and the desired outcome.

Conclusion

In conclusion, machining is a process of removing material from a workpiece to create a desired shape or surface finish.

There are several types of machining operations, including turning, milling, drilling, grinding, broaching, honing, and electrical discharge machining (EDM).

Each type of machining operation has its unique characteristics and advantages, and the selection of the appropriate operation depends on the type of material, the desired shape, and the required surface finish.

Machining is a critical process in the manufacturing industry and is used to produce a wide range of products across various industries, including aerospace, automotive, medical, and many others.

The development of new machining technologies and techniques has led to increased precision, efficiency, and quality in the production of machined parts.

If you are interested, check out metal machining near me

Categories
Uncategorized

What’s The Best Repellent For Wasps And Bees?

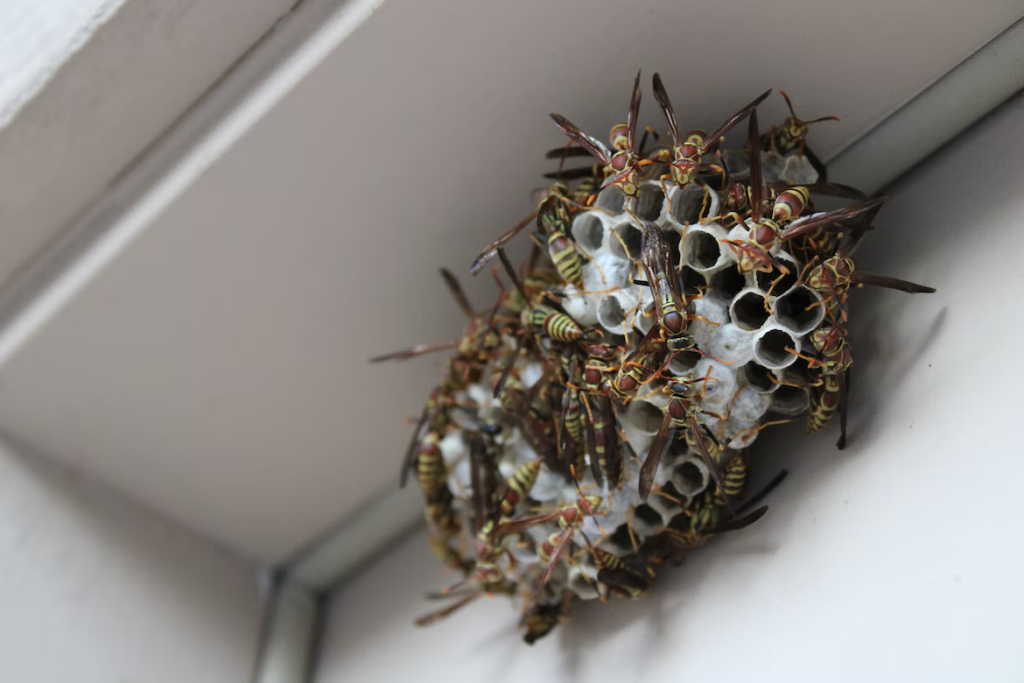
If you’ve ever endured the pain of a wasp or bee sting, you are aware of how unpleasant it can be. A pleasant outdoor gathering can be rapidly transformed into a nightmare by these buzzing insects.

But fear not, there are several practical methods to keep them out without using hazardous substances or perilous traps. We’ll look at some of the top all-natural wasp and bee repellents in this article so you can enjoy the outdoors without worrying about getting bitten.

We have everything you need, from natural components to common home items. So let’s dig in and learn the most effective techniques for avoiding these bothersome insects!

Wasps And Bees: What Are They?

Flying insects like wasps and bees share a common ancestor in the order Hymenoptera. There are clear distinctions between them in terms of appearance, behaviour, and way of life, despite their shared commonalities.

Bees’ characteristically hairy appearance comes from the fine bristles they use to transport pollen from flower to flower. Their bellies are striped with black and yellow, another identifying feature.

Bees are well-known for the pollination services they provide, which are essential to the survival and spread of many plant species.

Although beneficial to the environment, bees and wasps should be avoided if, at all possible, and wasp nests should never be placed near human habitations or public gathering places. It’s crucial to know how to safely remove nests and how to protect yourself from being stung.

What’s The Best Repellent For Wasps And Bees?

Several natural repellents can help keep wasps and bees away. Here are some of the best options:

Peppermint Oil

A natural essential oil, peppermint oil is distilled from the leaves of the peppermint plant. Besides its many culinary and medicinal uses, its potent minty perfume makes it a popular ingredient in aromatherapy treatments.

Many factors contribute to peppermint oil’s effectiveness as a wasp and bee repellant. Its powerful odour is offensive to these pests, which may help keep them away from places where it has been applied.

In addition, the insecticidal qualities of chemicals like menthol and limonene found in peppermint oil can help prevent wasps and bees from establishing nests there.

Add a few drops of peppermint oil to a spray bottle of water and use it to spray around entryways, windows, and outdoor dining areas to deter wasps and bees. Cotton balls drenched in peppermint oil can be placed beneath eaves or in building corners, where wasps and bees are known to nest.

Although peppermint oil has a low risk of causing harm to humans and animals alike, it should be avoided near the eyes and mouth.

However, peppermint oil may not be as effective as chemical sprays in regions with significant numbers of wasps or bees, so it’s best used as a prevention strategy rather than a treatment for an existing infestation.

Cinnamon

The aromatic spice cinnamon is harvested from the inner bark of many tree species of the genus Cinnamomum. It’s often used in baking and cooking because of its sweet, toasty scent. Yet, you can use cinnamon as a natural wasp and bee repellant.

Wasps and bees may avoid places where cinnamon has been treated because of its potent odour. To use cinnamon as a bug deterrent, simply sprinkle ground cinnamon on garbage cans, picnic tables, and other insect-prone areas.

The essential oil of cinnamon can be combined with water in a spray bottle to make a cinnamon spray, which can then be sprayed on the affected regions. The cinnamon oil may settle to the bottom of the bottle, so give it a good shake before each use.

Cinnamon may not be as effective as chemical sprays in regions with high concentrations of wasps or bees. However, use caution when applying cinnamon and keep it away from your eyes and skin, as it might irritate you.

Vinegar

Vinegar, which is found in most kitchens, can be used as a safe and effective natural wasp and bee repellent. Vinegar’s acidic smell is offensive to insects, thus it can help keep them away from treated areas.

To use vinegar as a repellant, fill a spray bottle with equal parts vinegar and water and spray it around entryways, windows, and outdoor eating places, where wasps and bees are most likely to congregate.

Cotton balls dipped in the vinegar solution can also be placed in locations frequented by the insects.

It’s possible that vinegar won’t work as well as chemical sprays in regions with lots of wasps and bees. However, vinegar can be corrosive, so it’s best to try it out in a tiny, hidden area first before applying it throughout.

Vinegar is non-toxic and can be used on humans and animals without worry; however, it should be avoided close to the mouth and eyes. If you live in an area where ants or flies are a problem, you may want to avoid using vinegar.

Garlic

The pungent herb garlic has been valued for millennia for both its medicinal and culinary uses. A natural wasp and bee repellant, it has further uses.

Garlic can be used as a repellant if a few crushed cloves are added to a spray bottle of water. For best results, let the combination hang out for a few hours to allow the water to absorb the garlic’s aroma and healing powers.

Finally, spray the concoction around entryways, windows, and outdoor eating areas to keep wasps and bees at bay.

Insect nesting sites, such as roof eaves and building nooks, can also be treated with crushed garlic cloves. The pungent odour of garlic may be offensive to these pests, driving them away.

Caution should be exercised while applying garlic near the eyes or mouth, even though it is generally safe for humans and animals.

It is recommended to use garlic as a preventative measure rather than a treatment for an existing infestation because it may not be as successful as chemical sprays in places with significant numbers of wasps or bees.

Lemongrass Oil

Extracted from the leaves of the lemongrass plant, lemongrass oil is an all-natural, essential oil. Its powerful citrous perfume makes it a popular element in aromatherapy treatments and culinary preparations. Very useful as a natural wasp and bee repellant is lemongrass oil.

If you want to keep insects away from your entryway, windows, and outside dining area, try using a mixture of lemongrass oil and water in a spray bottle.

Cotton balls soaked in the oil of lemongrass can be placed in corners and beneath eaves, where wasps and bees are known to make their nests.

They may be scared away by the powerful aroma of the lemongrass oil, which is unpleasant to them. Compounds in lemongrass oil, like citral and geraniol, have insecticidal qualities and can be used to ward off wasps and bees.

For this reason, it is vital to exercise caution when putting lemongrass oil near the eyes or mouth, even though it is generally harmless for both humans and animals.

It is best used as a preventative approach rather than as a remedy for an existing infestation because it may not be as successful as chemical sprays in places with significant numbers of wasps or bees.

Conclusion

Natural wasp and bee repellents are available and can be used to keep these insects away from undesirable locations. Sprays or containers containing ingredients like peppermint oil, cinnamon, vinegar, garlic, or lemongrass oil are all great ways to ward off pests.

Natural repellents are generally safer for humans and dogs than chemical sprays and can be an excellent option for use in outdoor eating areas or around homes and gardens, however, they may not be as effective in regions with significant populations of wasps or bees.

It’s worth noting that natural wasp and bee repellents aren’t always 100% effective, despite popular belief. Consult a professional pest control service if the infestation is severe or if you have an allergy to the insects involved.

Looking for bees & wasps pest control Services In Melbourne? You’re in the right place, click site now!

Categories
Uncategorized

What Is Stump Removal Process?

As part of our ongoing series on landscaping and tree maintenance, we’ll be discussing the removal of stumps. No matter how recently you chopped down a tree or how old the stump is, getting rid of it is crucial to keeping your yard looking nice and healthy.

Although removing a stump might be a challenging task that calls for special equipment and knowledge, it is possible to eliminate the eyesore permanently with the appropriate strategy.

This new article will focus on the steps involved in removing a stump and will provide helpful advice for doing. Well, see it here and let’s get going!

Stump Removal: What Is It?

When a tree has been chopped down, the remaining part of the trunk, known as the stump, is removed in a procedure known as stump grinding or stump removal.

Tripping risks, bug infestations, and even new tree growth from the stump are just a few of the many issues that can arise from the presence of a stump.

Depending on the location and size of the stump, many methods can be used to remove it. Removal of small stumps is usually possible by hand using a shovel, axe, or pry bar. Larger stumps, however, can call for more robust equipment like a stump grinder or excavator.

Even though removing stumps can be a tedious and time-consuming task, it is necessary for a flourishing and aesthetically pleasing garden. Hazards can be avoided and the landscape can be made more uniform if stumps are removed.

What Is Stump Removal Process?

Stump removal can take anything from a few hours to several days, depending on the stump’s location, size, and the methods and tools employed. Yet, below are the standard procedures for cutting down a stump:

Assess The Stump

Before beginning the removal process, it’s important to assess the size, location, and condition of the stump. This will help determine the best removal method.

The optimal method for eliminating the stump safely and efficiently must be determined after a thorough assessment of the stump. A stump grinder or excavator may be needed for a particular huge stump, although a smaller stump may usually be removed by hand.

Another important consideration is the stump’s placement, as removing a stump that is close to a building or other structure may necessitate additional caution.

It is also important to evaluate the stump’s age and condition to determine whether it will be easier or more difficult to remove the stump based on its age and condition.

To remove a stump safely and without causing any additional damage, it is important to first select the best method for doing so. To evaluate the stump’s safety and remove it effectively, a professional tree service should be contacted.

Clear The Area

Clear any debris or obstacles around the stump that may interfere with the removal process. While removing a stump, it is vital to clear the area surrounding it first to ensure the safety and efficiency of the removal procedure.

To make room for the stump, clean the space around it of any rocks, branches, or bushes that might be in the way. The removal process can then proceed without any obstacles.

If you want the space cleared and the stump removed quickly and safely, it’s best to employ a professional tree service.

Cut The Stump

If the stump is tall, use a chainsaw or hand saw to cut it as close to the ground as possible. This will make it easier to remove the stump. The second stage in removing a stump entails cutting the stump with a chainsaw or handsaw to get it as low to the ground as feasible.

Use safety equipment including gloves, goggles, and earplugs while you cut the stump. Take care to maintain the sharpness and overall condition of the chainsaw or handsaw you’ll be using.

Remove as much of the stump as you can without damaging the earth, but leave some of it above ground. It’s best to call a professional tree service to remove the stump.

Dig Around The Stump

Use a shovel or digging bar to dig around the stump and expose the roots. This will make it easier to remove the stump and its roots. The third stage in stump removal is to dig around the stump and expose the roots, which can be done using a shovel or digging bar.

Wearing protective gear, including gloves and goggles, is required when working in the area around the stump. The stump can be removed by digging around it with a shovel or digging bar.

Do not destroy any adjacent trees, plants, or buildings. It’s important to dig down to the stump’s roots. To dig around the stump safely and effectively, it is suggested that you engage a professional tree service.

Remove The Roots

Use a root saw or axe to cut through the larger roots. Then, use a grub hoe or mattock to loosen and remove the smaller roots. The fourth and last step of stump removal entails removing the roots, which can be done using a variety of tools and equipment.

Using safety equipment like gloves and goggles is a must before beginning root removal. To get rid of the larger roots, you can use an axe, pruning shears, or a root saw.

Then you can loosen the smaller roots with a grub hoe, mattock, or pickaxe, and pull them out entirely. At last, an excavator or stump grinder can be used to get rid of any lingering roots.

For effective and safe root removal, it’s best to work with a professional tree service. They know what they’re doing, and they have the equipment and expertise to get rid of the roots without harming any of the surrounding vegetation or buildings.

Pull Out The Stump

Use a tow strap or chain attached to the stump to pull it out of the ground. Alternatively, use a stump grinder to grind the stump into small pieces. The last step of stump removal is to physically take the stump and roots out of the ground using special equipment.

Using safety equipment like gloves and goggles is required before attempting to remove the stump.

It is recommended to use a stump grinder or excavator to cut the remaining stump and roots into smaller pieces, and then a winch or crane to remove the smaller parts from the earth.

If you want the stump removed quickly and safely, you should get in touch with a tree service. They know what they’re doing and have the gear and expertise to get rid of the stump without damaging the trees, landscaping, or building structures around it.

When the stump is gone, the area can be levelled and filled in to make way for new growth.

Fill In The Hole

Once the stump is removed, fill in the hole with soil and tamp it down to ensure a level surface. Refilling the space created by the removed stump with soil, rocks, or gravel is a crucial part of the stump-removal procedure.

It is crucial to utilize an adequate quantity and quality of fill material while repairing the hole. To improve the drain, and age, first, backfill the hole with dirt, in place it on some rocks or gravel.

Add dirt and other fill material in successive layers until the surface of the hole is flush with the surrounding ground.

Many factors, including topography, soil composition, and water runoff, will determine the ideal fill material for a given site. To select the right fill material and amount for a certain location, it is best to speak with a professional landscaper or arborist.

After the hole has been patched, new grass can be seeded there or sod laid to establish a garden.

Conclusion

To get rid of a stump and make a bare patch in your yard, you need to do some work. Steps include evaluating the stump, cleaning the area, cutting the stump, digging around the stump to expose and remove the roots, and finally hauling out the stump

To minimize accidents and make the area look better once the stump has been removed, the hole must be filled with the appropriate fill material.

If you want to make sure the stump is removed safely and efficiently without harming any other trees, plants, or buildings, it’s best to employ a professional tree service.

By removing stumps in the right way, you can transform an unsightly area into a useful and attractive landscape.